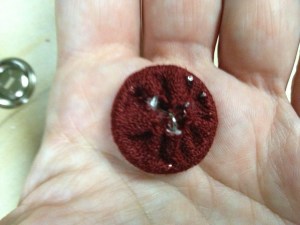
I love covered buttons. They just make a design look so pulled-together. The problem is that that directions on the back of the covered button kits are a little bit less than useful. They’re actually kinda bad. So for anyone who has ever wondered, here’s the sitch….
You will need:
- Scraps of fabric
- Covered button kit
- Scissors
- Patience
Here’s how you do:


I interfaced the fabric I’m using for this button, btw, because my fabric is a stretchy wool crepe. I do not want it to stretch while I’m working, because I don’t want the silver from the base to shine through.


This is where things start to get frustrating. Smoothing a flat piece of fabric over a round item leads to wrinkles unless you pull. Unfortunately, there’s not a lot of working room inside the darned button. I find it easiest to work in 1/4″ increments – move 1/4″ from the last set of teeth to sink into fabric, pull fabric straight up and secure with teeth, then go back and work fabric into the remaining teeth in the 1/4″ area being worked.
The package suggests that using a pencil eraser will help with this process. So I tried it, because I was tired of little button teeth chewing on my fingers. I experienced a profound lack of success. Your mileage may vary…


I feel like I really should have used a smaller sciss-ing device there, but the trusty Fiskars were right there…


If only I needed just one…. Le sigh. A seamstress’ work is never done.

I’m binge-reading your blog (is that blog-stalking?) planning to get back into sewing.
If you get the kind with the “mold” (a flexible thimble-thing that smooths the fabric for you) you can skip all the tedious work trying to get the fabric onto the teeth. After you have the kit with the mold, just buy the refills.
It’s the easy way to move a blouse up the fashion scale: replace the cheap white plastic buttons with fabric ones.
If it’s a print, center the part of the design you want on the blank, or for inconspicuous closings, match the fabric print at that spot.
Lol – binge/stalk away! I’ve never seen the object you are describing. Now I will have to scour the interwebs (ok, no, I’ll just check Amazon) for one. It sounds like a much better idea. :)
Replacing buttons is always a great fashion hack. Thanks for all the info and tips!